
Custom hubs
A custom hub is a level that works like a warp room: it contains level entrances that lead to your other custom levels. A hub together with its levels is a modpack.
Prepare each level
Section titled “Prepare each level”Every level that a hub points to must be set up once:
-
Locate the level archive (
.pak) you want to add to the modpack. -
Make sure its file name contains no space and no special character.
My_Amazing_1st_Level.pakis a valid name. -
Open the archive in the editor and run
File → Archive → Update level name, which sets the level up internally to match its file name. -
Save the archive and put it in the game’s
archives/folder.
If you rename the archive later, run Update level name again and update the entrance in your hub.
Build the hub
Section titled “Build the hub”No special step is needed to create the hub itself: create it like any level with New Level, then enable Enable Hub in Level settings.
To add a level entrance:
-
Right-click in the scene and choose
New platform → Level entrance.... -
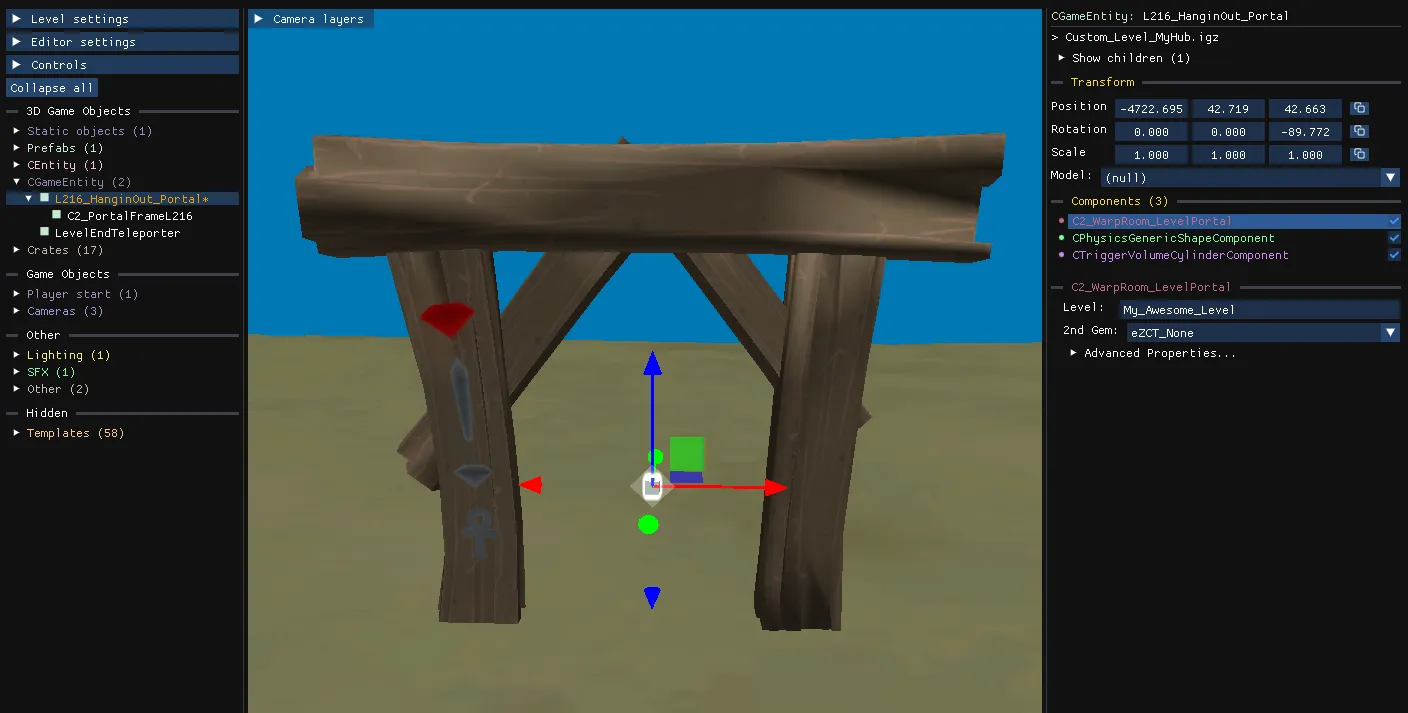
Select the new portal entity and open its
C2_WarpRoom_LevelPortalcomponent. -
Set the Level property to the archive name of the level, without the
.pakextension, exactly as set above.
Test and share
Section titled “Test and share”When the hub is launched, the editor checks that every level it references is available and reports the missing ones. Finishing or exiting a level brings the player back to the hub.
Ship the hub archive and every level archive together with the installation instructions below, and consider using File → Remove unused files and File → Compress & Save on each archive to reduce the download size.
Installation instructions for players
Section titled “Installation instructions for players”-
Put the hub archive anywhere on the PC.
-
Put all the level archives directly in the game’s
archives/folder, without creating a subfolder. -
Use Play Custom Level and select the hub archive.
You can link players to Install custom hubs and modpacks.